Set up VS Code as the default IDE for Unity on macOS
Note: You can set any other editor (like Sublime Text or Notepad++) being the default one in the same way.
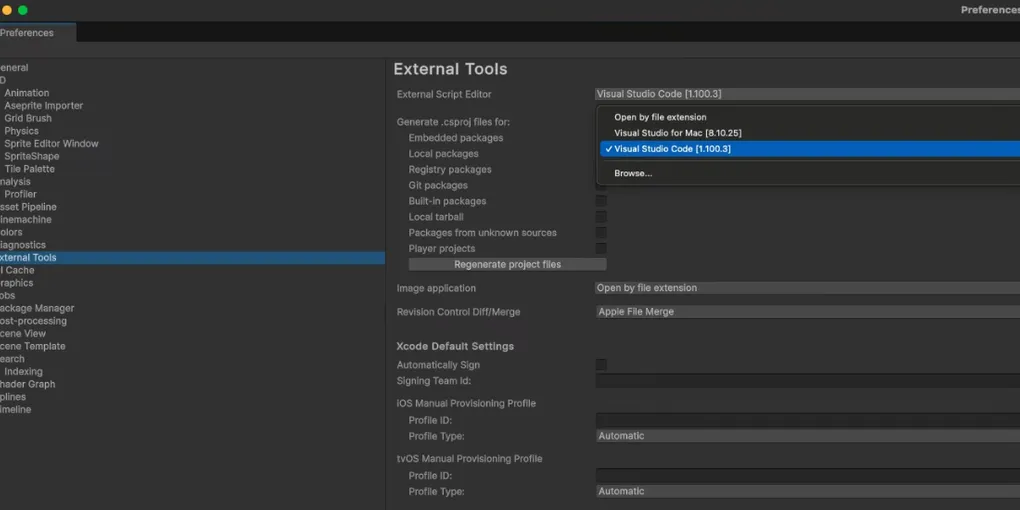
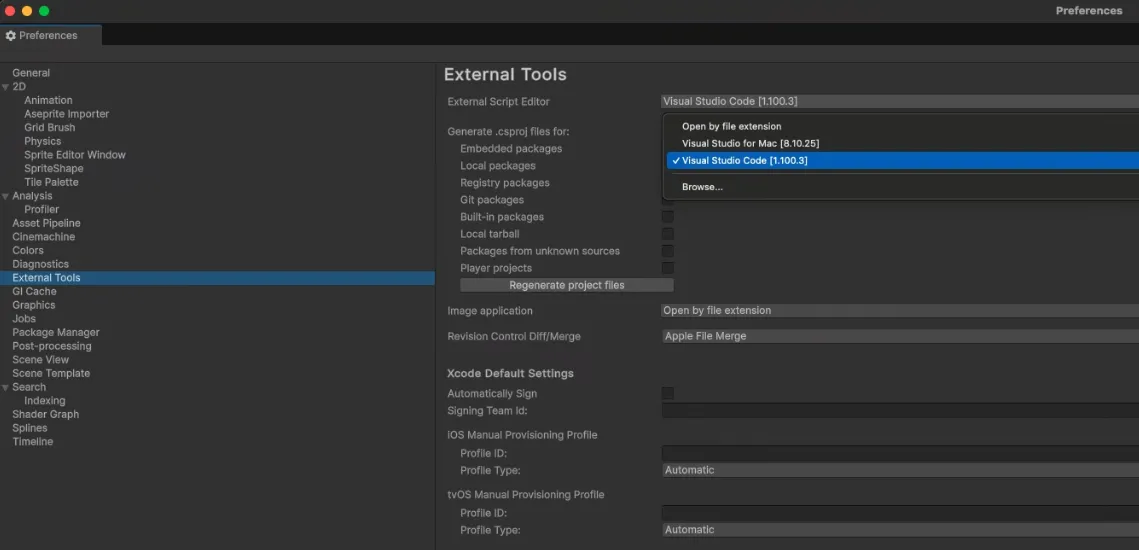
Make sure that you’ve set VS Code as your preferred external editor in your Preferences.
In Unity, go to: Edit → Preferences → External Tools. Then, set your External Script Editor to “Visual Studio Code”.
Warning: Direct support for VS Code in Unity was dropped in 2022. If VS Code is not appearing in the list, you will need to manually find the location of VS Code.
To make setting up your External Script Editor a little easier, you may want to try installing the “Visual Studio Code Package” from the Package Manager. This package has now been deprecated by Unity and will not appear in the “Packages: Unity Registry” tab, however, if you know the internal name of the package, you can install it using this instruction:
Tip: In case of deprecated Visual Studio Code Editor, the internal name of the package is:
com.unity.ide.vscode
In order to highlight C# syntax properly and get auto-completion feature, you’ll also need to install Unity for Visual Studio Code:
VS Code Unity extension setup (MP4)
If something is still not working (e.g. IntelliSense is not suggesting line auto-completion), the next step is to double check that you have the correct .NET framework installed on your machine.
Start with the latest .NET Core SDK and .NET SDK packages, which you can download here.
Once these are installed, restart your computer to apply changes.
Warning: At this point you may need to head back into your Preferences and check that VS Code is still set as your External Script Editor.
Next on the list is to open up VS Code and check that the correct solution workspace is selected.
- Press Ctrl+Shift+P to open the command palette
- Then type “Omnisharp: Select Project”
- Finally, choose the solution workspace (.sln or .slnx file) for the project you’re currently working on (which can be found in the root folder of your project)
One final option is to tweak some of the settings in the C# Extension you added to VS Code.
In the extensions panel select the C# extension, click on the gear icon, and then select “Extension Settings”. This will open up a new window and you want to scroll down the list until you find “Omnisharp: Auto Start” and you will need to check the checkbox in this option.
If you are getting an error in VS Code that says “Project Not Loaded” in the bottom right corner, you may need to try the following:
- Uninstall the C# extension (along with any dependencies)
- Reload VS Code
- Reinstall the C# extension
Tip: If you’re exhausted from tinkering with VS Code then remember that the script editor you use is largely a personal choice. If you really can’t get VS Code working, try something like Jetbrains Rider, Visual Studio Community or Sublime Text/Notepad++.
This will look different to the code editor used throughout the rest of the course and many of the hotkeys will be different. However, it’ll still allow you to write your code and should allow you to follow along with the course just fine!